| |
It
can be a difficult process to transform a person
into an alien, the following is the piece method
for creating a Cardassian.
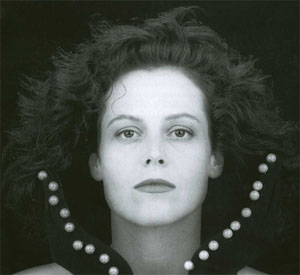
The
first rule of altering a picture is to start with
a large image, this one was over 1600 pixels across.
It was also good because the person is looking
forward, which makes it easier to make symmetrical.
|
 |
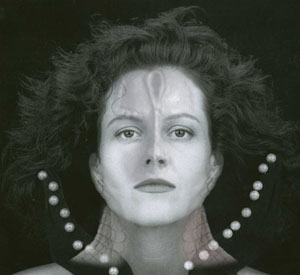
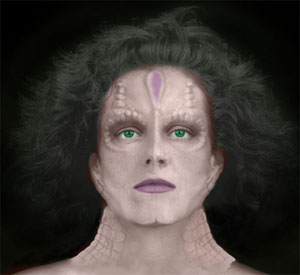
Here
I added three parts of images of Cardassians I could
find: The vertical nose ridge into the spoon on
the forehead, the jaw line that connects into the
ears, and the necklines. As you can see, especially
where the neck overlaps with the gloves, that the
pieces I put on are at an opacity of around 15%.
A very low opacity must be used, or your final product
will look like a hodgepodge of pieces, and will
not look like the person you started with, as an
alien. |
 |
After
putting some pieces on, I used the burn tool and
set it on a large feathered brush to darken areas
on the layer of the face that were very pale to
begin to equalize the tonal values. I also began
to use the rubber stamp tool to clone away the
gloves that were covering up the body and neck,
and were very distracting in the image. I also
used the smudge tool to pull out the neck on the
original image to fill out the Cardassian neck
|
 |
I
then found a good Cardassian eye socket but it was
at somewhat a different angle, so I pressed Ctrl
- T to transform it. Sometimes if an object is really
off you will have to go to Edit, Transform, Distort.
I also created a Cardassian chin with the smudge
tool set on a fine feathered brush, and I also use
the dodge and burn tools with a small feathered
brush too. |
 |
Next
I added a color layer, or three color layers rather,
for each color I used. I put all my color layers
in a layer folder on the top layer, this allows
you to close the folder and not have to view each
of your layers... when you're dealing with a lot
of layers, this can really simplify things. Cardassians
have skin tones from a very dull gray, to a medium
tan skin, and since the person that wanted this
image wanted to be part Human, I went with tan.
Cardassian women often use deep colors for makeup
on their lips and on their foreheads. |
 |
I painted each color on a separate layer at full
strength, and then under the Layers tab, I set the
blending from Normal, to Color, and for the different
layers I set the Opacity to different levels until
it got the right look. |
 |
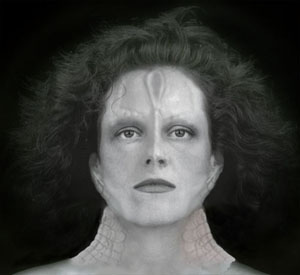
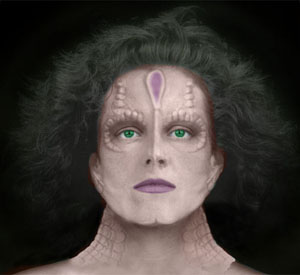
| The
image seemed to lack overall contrast, but especially
so under the neck, so I used the polygonal lasso
tool to select the area under the chin, and then
I feathered the selection (so that there wouldn't
be a harsh edge on my shading), and then I used
a giant feathered brush size with the burn tool,
and shaded under the chin to bring out a more realistic
depth back to the image that was lost when I darkened
the face and added lighter objects to the neck. |
 |
Star
Trek, and terms used such as Cardassian are registered
trademarks of Paramount Pictures Inc. This page is in
no way, shape, or form associated with Paramount Pictures
Inc. This is for instructional use and is for non-commercial
purposes only. All images produced for use in RP chat
rooms is done free of charge. Any misuse of copyright
materials is purely accidental. The start image is from
a free poster
site, which did not state who the photo's copyright
belonged to.
|
 |