|  Creating
an Animation: Creating
an Animation:
First
you will want to open all your images you want to animate
in photoshop, and our goal is to put them all into one
layered file. You can either drag one picture into the
other, or you can copy and paste them over. If you hit
Ctrl-A you will select the entire image, then you can
hit Ctrl-C to copy it, then move over to the image you
want to put it in and hit Ctrl-V to paste it. This method
will copy it to a new layer that is square on top and
center with the first image. If you used a tripod to take
the photos they will probably 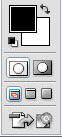 match
up easily, but if you did not you might have to change
your top layer to 50% opacity (so you can see the echo
of one image overtop the other) so you can line them up
properly. match
up easily, but if you did not you might have to change
your top layer to 50% opacity (so you can see the echo
of one image overtop the other) so you can line them up
properly.
Now
you're ready to switch to Image Ready, which is a program
that comes with Photoshop- to launch Image Ready just
push the button at the bottom of the tool bar. Once Image
Ready opens it should bring over the file you were working
on in Photoshop. To edit the file further you'll need
the animation palette open (You can go to Window and check
"Animation" if it is not open when the program
begins).
Next
you should click the arrow directly under the button to
close the palette and select "Make Frames From Layers"
and then your 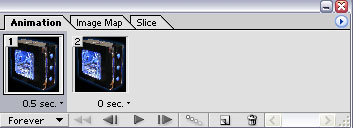 layers
will become frames in your animation. You can now hit
the play button and it will show you your animation. You
can drag any frame to before or after another to change
the order which they play, and if you click underneath
the frame photo you can change the duration which each
frame will play. The default is zero seconds which will
make for a very quick animation. layers
will become frames in your animation. You can now hit
the play button and it will show you your animation. You
can drag any frame to before or after another to change
the order which they play, and if you click underneath
the frame photo you can change the duration which each
frame will play. The default is zero seconds which will
make for a very quick animation.
Once
you are satisfied with your animation go up to File and
select Save Optimized As... and save the file. The file
you create will be an animated gif that can play in any
web browser. You should keep screen resolutions in mind
when you make the file and keep it under a few hundred
pixels across.
|